I received a lot, I mean a lot, of requests after I had published my 3 last posts about the storage of NIS maps in Active Directory [http://bit.ly/1S4gKUG – http://bit.ly/1qvvyzr – http://bit.ly/1q8iAHi ] – The main problem was my posts are in French 😉 and a lot of people tried to use Google Translate to get it, but it wasn’t perfect. So, from the popular demand, I decided to translate it in English. English is not my native language, so sorry in advance if you will find some ‘bugs’ in the text.
As I explained in one of my last post (sorry again in French !), Microsoft announced it will not implement some Unix Services in Windows 2016 and Active Directory 2016 anymore, including NIS Services.
Through my different projects, I had meet a lot of organizations which are using mixt environment with Windows and Unix boxes and I can say the NIS usage is even nowadays very widespread. For sure, it is very bad to use NIS authentication and NIS authorizations, it is really better to use Kerberos ad LDAP instead. I will not go in the details now, but it is true that NIS is not something secured, however, the fact to totally eliminate the NIS Services is impossible for a lot of organizations. These organizations have a « IT history », from years, and a lot of very important information still remain in the NIS maps (automount, etc.)
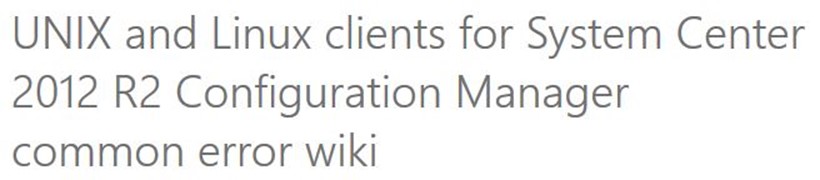
So, the goal is to use Kerberos/LDAP for authentication/authorization services and a NIS Gateway service which expose to NIS client the maps NIS which are stored in Active Directory. Using this way, we get the best of the two worlds, we can secure the authentication with Kerberos and the organization is able to continue to use the NIS maps for the legacy needs.
In this tutorial, we will use the NIS Gateway provided by Centrify and get a magic trick to improve security without abandon the NIS history.
Inn this tutorial, we will use a Fedora 23 workstation as a NIS Gateway and Fedora 23 as a NIS client, in my example the Active Directory is a Windows 2012R2 one, but it will work with various flavors of Linux/Unix and with different versions of Active Directory.
A/ First step: Centrify packages installation on the future NIS Server (=NIS Gateway)
First, we need to set our NIS Gateway with a hostname and with a IP which permit to the NIS Gateway to communicate with the Active Directory world. Here, we consider that the basic settings regarding the Centrify Zones are already done (just refer to the Centrify Quick Start Guide to do it).
1/ Hostname settings

In our example, the hostname of the NIS Gateway will be: nisserver01.demo.local
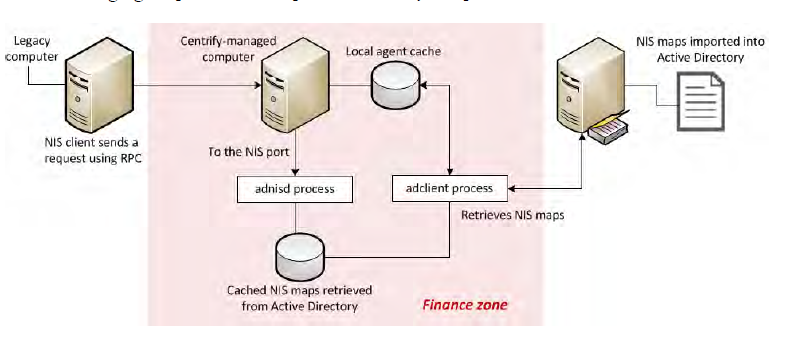
2/ SSH checking
We will check that the SSH server service is present on the Linux box, we will need it to transfer the packages for the Centrify agent and the packages for the Centrify NIS Gateway on the NIS Server.
If the SSH server is not installed, type the following command to install the SSH server packages:

When the SSH packages are installed, you need to start the SSH service

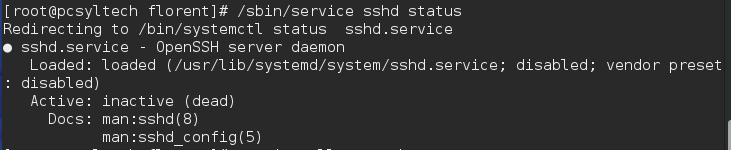
3/ Centrify packages transfer to the machine
We will use WinSCP to transfer the Centrify agent (Centrify Server Suite 2016) on the NIS server (/tmp directory for example) – for a Fedora23 OS, the name of the package is centrify-suite-2016-rhel4-i386.tgz
4/ Centrify agent installation
Go the the /tmp directory and check you have the agent package.
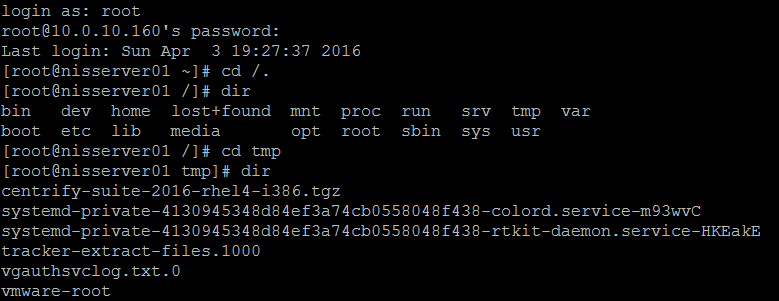
Unzip the package:

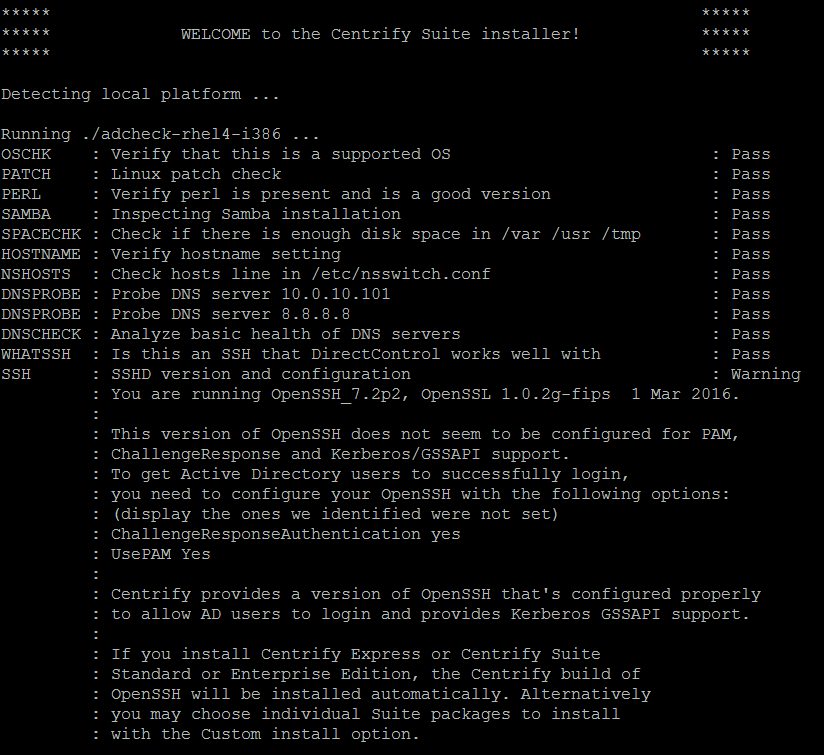
Instal the agent, using the install.sh script:

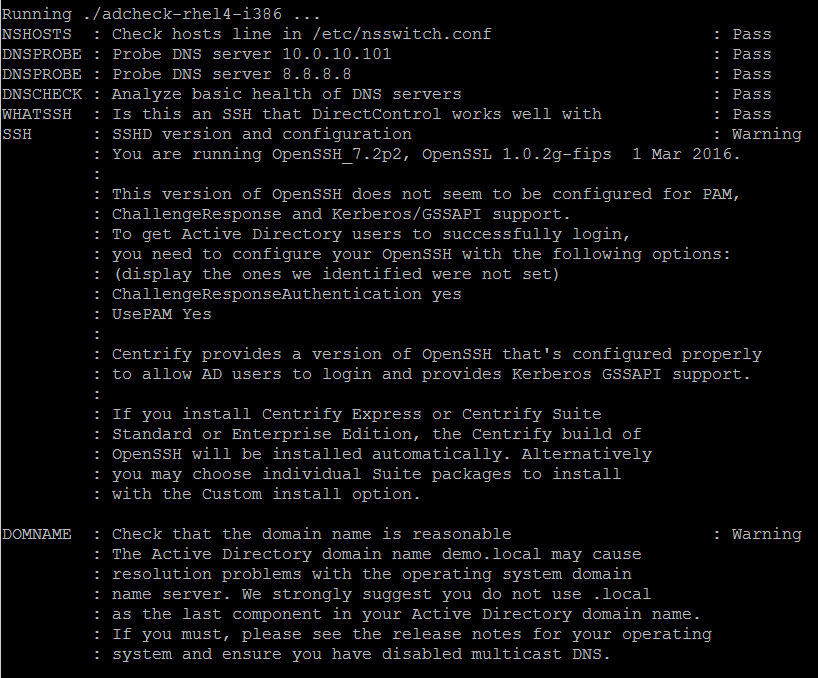
The install.sh script will check everything to be sure your system is able to get it – if you don’t have any ‘failed » result, you will be able to install the agent – if you get some ‘warning’ result, it is not really important (we are doing a POC !)
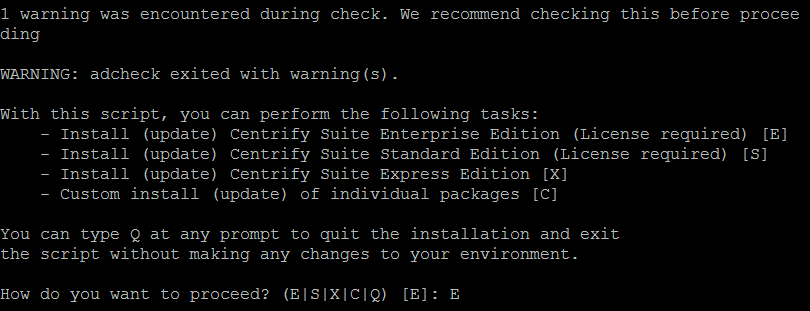
Choose the Enterprise or the Standard version, it doesn’t matter for the NIS Gateway itself, so let’ choose Enterprise [E] in our example:
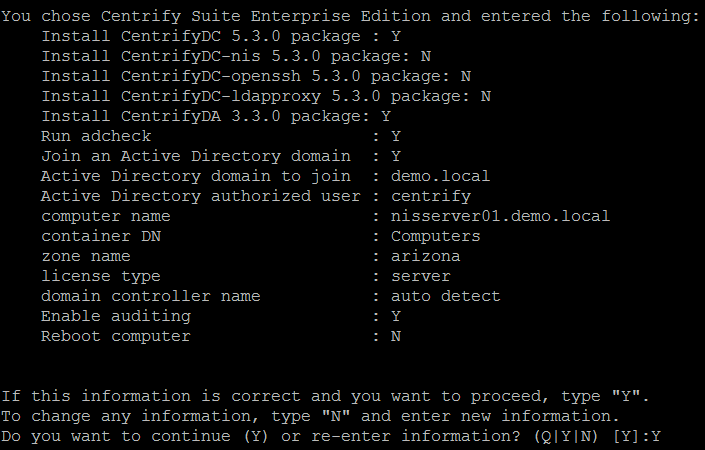
Choose the run adcheck again (just to be sure…) et provide the needed information linked to Active Directory during the installation process – In our example, we will join a zone named arizona, so our NIS server will provide « NIS service » for this zone – and choose to not reboot at the end of the installation:
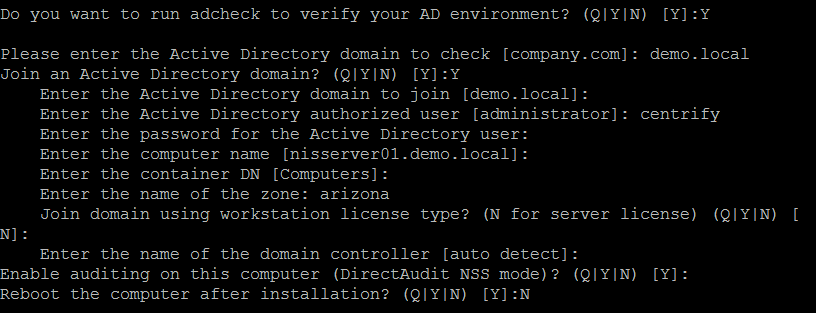
As soon the information will be provided, the install process will start, but just before the installation process will ask you to verify your different values.
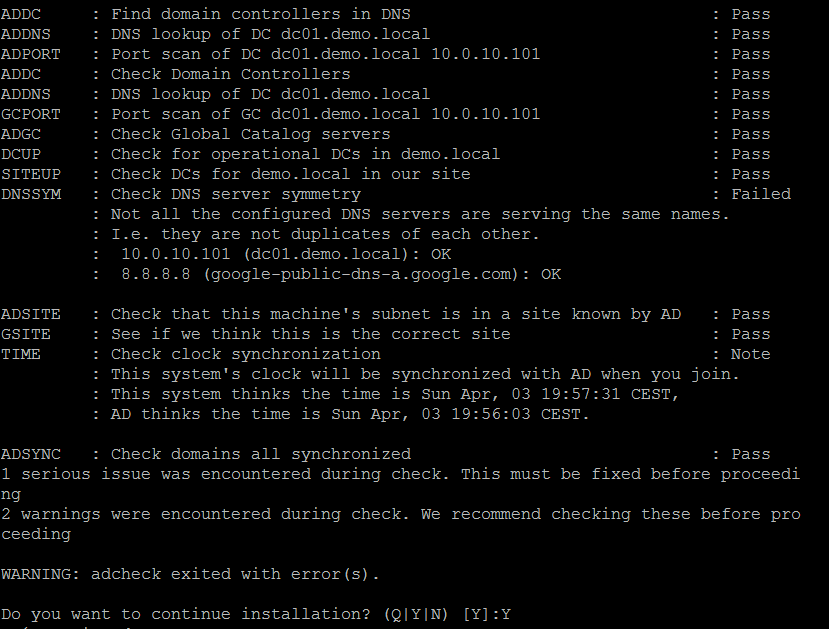
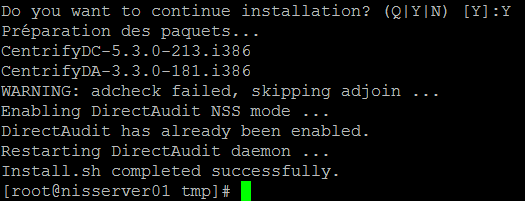
The installation process is starting – after the adcheck final check, just validate the agent installation process:
At the end of the process, the Centrify agent installation proceeds:
Now, we will install the package which will update the SSH Server packages with the Centrify packages – this is not 100% mandatory, but it will provide a better integration with Kerberos authentication, so let’s do it:

Now, we will install the Centrify NIS Gateway package:

At the end, just reboot the system, again this is not 100% mandatory, but let’s do it easier and reboot the system.
At this stage the first big step is over. Let’s see now how to set Centrify NIS Gateway.
B/ Second step: Centrify NIS Gateway settings
1/ Active Directory integration of the NIS Gateway Linux box
We will integrate the NIS Server in the zone named arizona. We consider here that you already performed the basic step of the Centrify installation procedure (refer to the Centrify Quick Start guide for details) and we consider you already created some Centrify zones in Active Directory.
First, let’s connect to the NIS Server and execute the following command to perform the Active Directory join to the arizona zone:

In our example, the domain is named demo.local, the Centrify zone is named arizona and the Active Directory service account used to perform the Active Directory join is named centrify. And the password for the service account is …no, for sure, just kidding ;-)) – but the join process will ask you the password for the Active Directory service account.

After few seconds, the following window will appear, saying everything is ok:
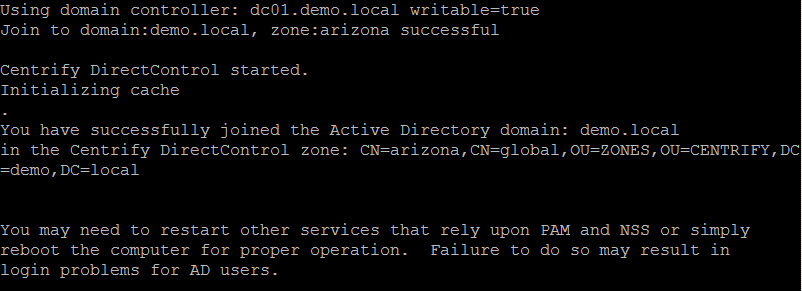
It is not mandatory to reboot the server itself, but to make it easier, let’s reboot the server:

2/ Let’s check some important things
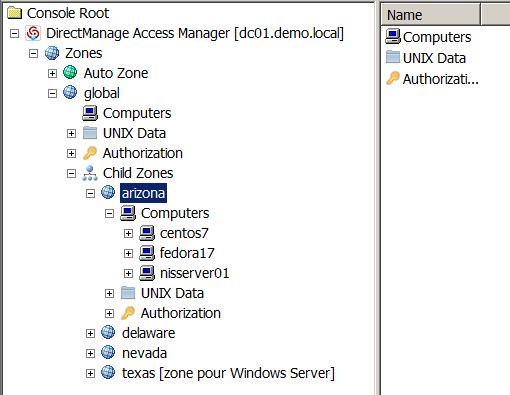
Now let’s set some accurate parameters of the Centrify NIS Gateway. We will start to start the management tool Centrify Access Manager, we will find a new machine account in the zone names arizona, it is nisserver01:
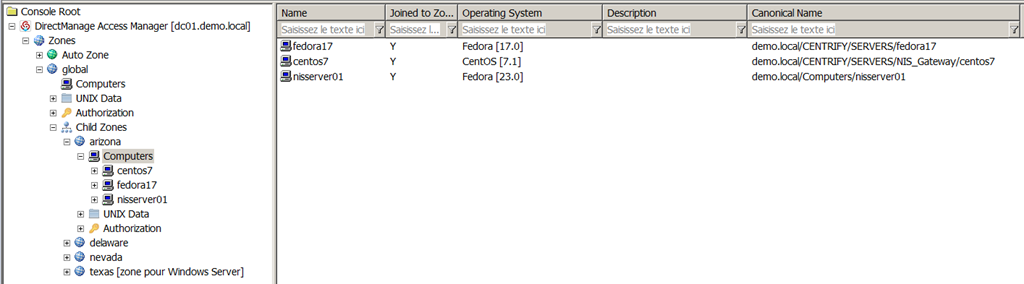
This is another view with the list of the machines in the Centrify zone. We will use a other machine from this zone to be NIS client (ypbind) of our NIS Gateway. For sure, the NIS Gateway as a NIS server only for the machines which are in the same zone.
As we didn’t specify a specific container during the Active Directory join of the NIS Gateway, the computer object which represents the NIS server is stored by the containers Computers in Active Directory or any default container if you changed your Active Directory configuration:
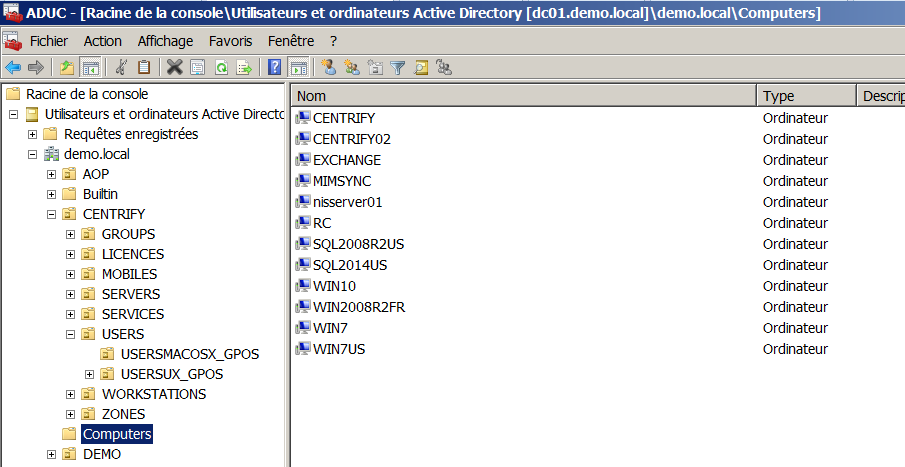
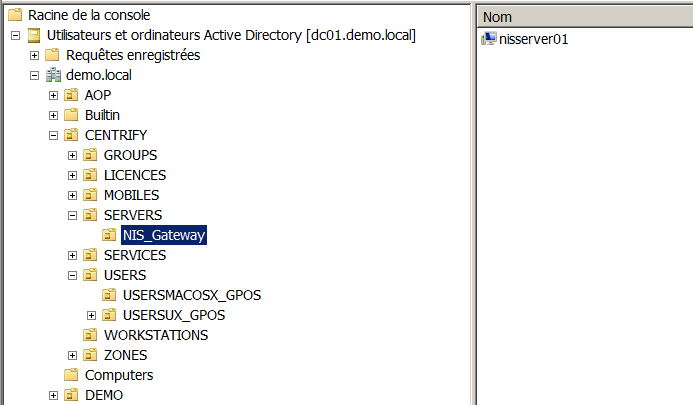
Because we will apply some specific GPOs on the computer object which represents the NIS Gateway, we will create a new organization unit (OU) and we will move the computer object in it- in our example, the OU is named NIS_Gateway:
Now, we will start our NIS Gateway computer. When the computer will be started, it would be possible the use any AD account with a UNIX profile in the Centrify zone to log on it, but we will log as root to make it more convenient for the future manipulations.
As soon you are logged on the system, just type the adinfo command, you will obtain information about the state of the adclient daemon which represents more or less a Active Directory client for UNIX/Linux:
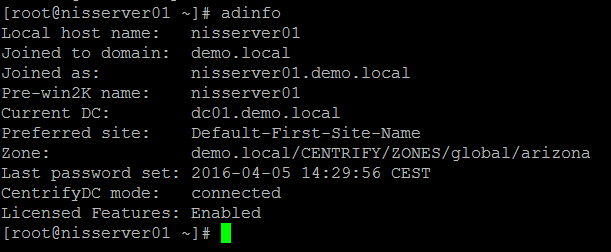
The most important thing is to have the value ‘connected’ for the attribute ‘CentrifyDC mode’, this means the system is truly connected to Active Directory and communicate with it. At this stage, our Linux server is integrated in Active Directory and it is totally secured, thanks to Centrify technology.
3/ Apply specific settings on the Centrify NIS Gateway
Let’s set some settings to set the correct behavior of Centrify NIS Gateway (adnisd).
First, we will use the Centrify extension for the GPMC to create some specific GPOs to set the NIS Gateway, nisserver01. Centrify provides some ADMX files if you just want to use the classic GPMC provided by Microsoft, so you can import the administration model in the GPMC. Or you can install some Centrify GPMC snap-in to create the UNIX/Linux GPOS. It is up to you, but you need to do one or the other.
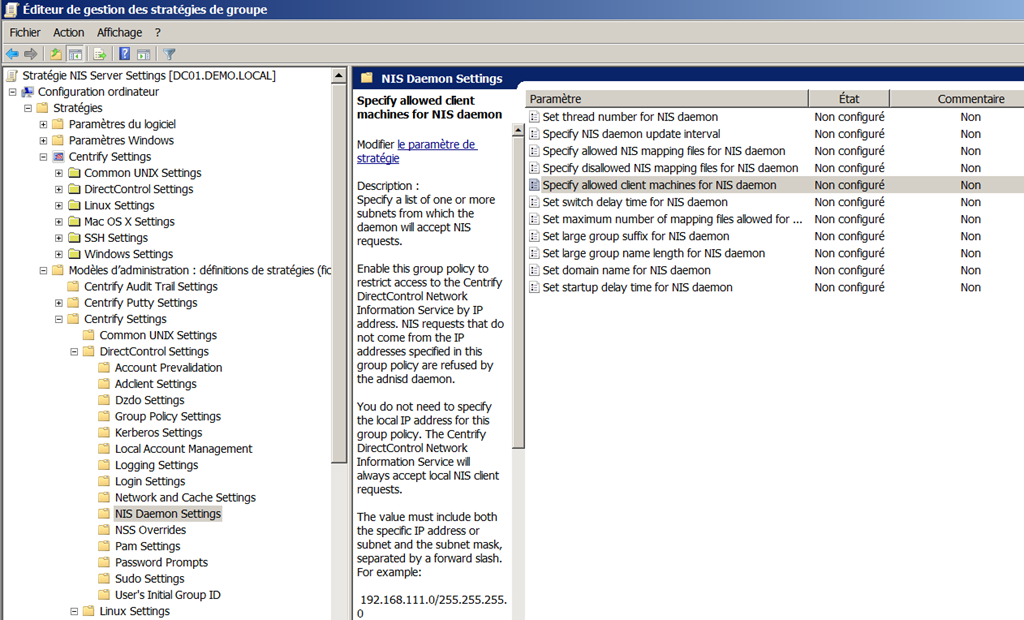
Here we will use the ADMX files method, and e consider we already import the different ADMX files in the GPMC. Open the GPMC and go the node « computer configuration / Strategy / Administration model / Centrify Settings / DirectControl Settings / NIS Daemon Settings:
Edit the ‘Specify allowed client machines for NIS daemon‘ property and set the value to 0/0:
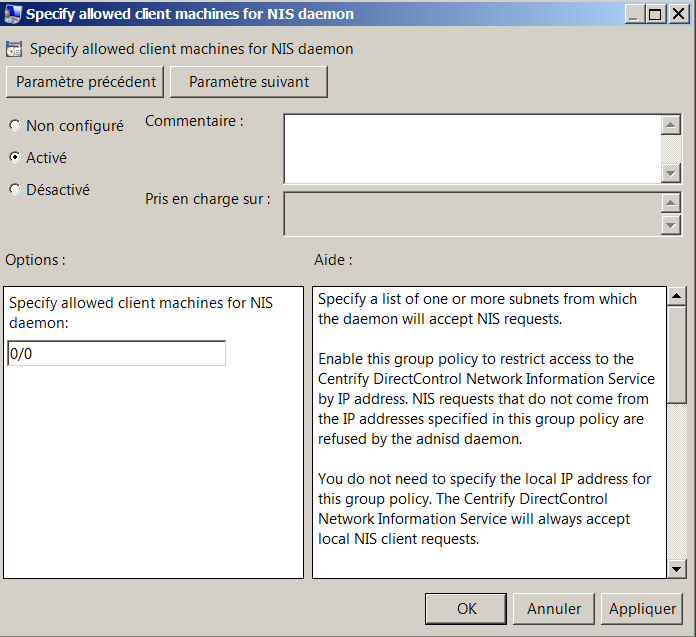
We need to do so, because by default, the NIS Gateway only accept NIS request from itself (I will not go in the details, but in some specific secured configurations where you need to deploy the NIS Gateway packages on all the UNIX systems, this « by default » behavior is useful). So we need to define the is of the IP addresses which are authorized to request the NIS service, if you set the value to 0/0, the NIS server will accept all the request from all the client.
Let’s edit also the ‘Specify NIS daemon update interval‘ property and set the value to 60.
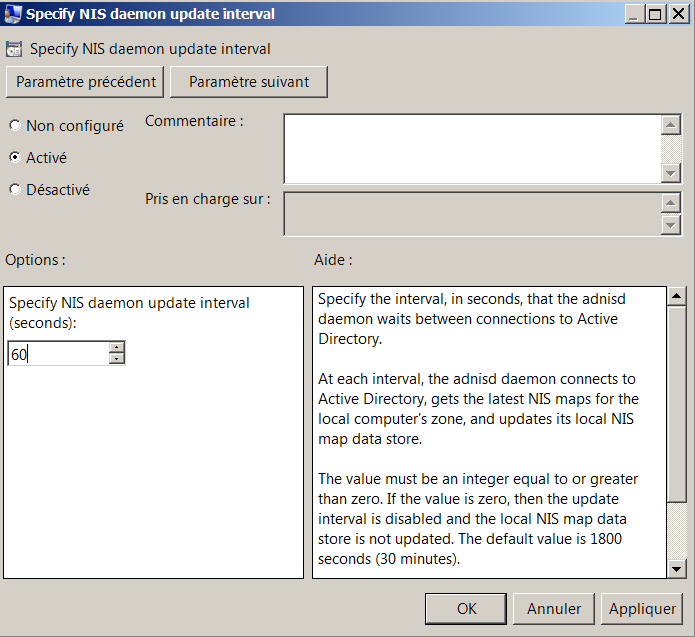
This property will allow us to set the synchronization time between Active Directory and the NIS Gateway. Because of performance reasons, the NIS Gateway maintains a local cache of the values from Active Directory, so in our example, the values will be replicate every minute. In a production environment, a value between 16 and 30 minutes seems a good choice.
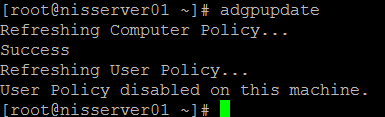
Just validate the GPO and close the GPMC. If you want to update the NIS Server with these new settings, it is just matter to execute the adgpupdate command on the NIS Server, this command will refresh the GPOs settings from Active Directory. You can also wait for the next GPO application process (the time period will depend of your Active Directory settings):
It is possible to check which GPO is applied or not by executing the adgpresult command on the system, here, we will see the settings we just created in the new GPO we created:

C/ Third step: Verify some elements on the Centrify NIS Gateway settings
As you may know, to have a consistent NIS Server on a system, we need to have RPC services up and running. If you don’t know so much about NIS, I recommend to read this book which is for me a sort of « NIS bible » [ special thanks to Randip M to let me know about this book. 😉 ]
I will not go in the very details, but globally the RPC server service will receive the requests from the NIS/RPC client from the network, so the RPC server service will decide to use a certain port number, using the port mapper, then the communication between the client and the server will use this specific RPC port for the rest of session. So to have a NIS server running in the right shape we need to have a RPC server running in the right shape.
To verify if everything is ok for the RPC server, execute the following command: rpcinfo –p localhost
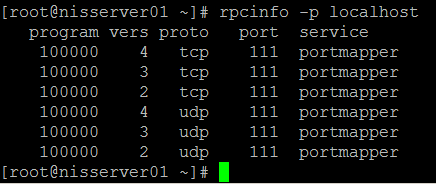
Here we can see we have six port mappers waiting for a RPC connection, so everything is ok.
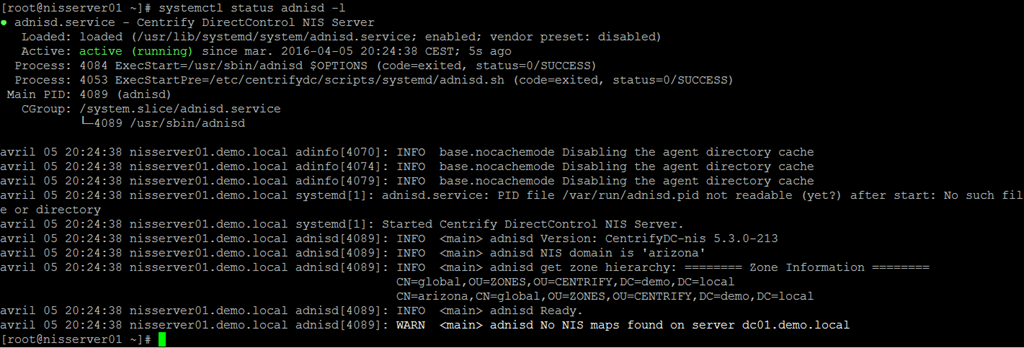
We will now check if the Centrify NIS Gateway service (adnisd) is up and running by executing the following command: systemctl status adnisd –l
If the adnisd service is not running, execute the following command to start it: systemctl start adnisd –l
When we execute the command systemctl status adnisd –l to check the status of the service, we have a message saying that we don’t have any NIS map stored in Active Directory, at this stage it is totally normal, we will publish NIS maps in Active Directory latter.
D/ Fourth step: Check the configuration of the NIS client
1/ some thoughts about what we are doing here…
At the Linux client level, it is very important to understand that we have two different components:
– The Centrify DirectControl agent which provides the ability of the system to be fully integrated in Active Directory and provides the Kerberos and LDAP layers for authentication and authorization against Active Directory – Even if we have a NIS client on system to use NIS maps, the authentication is not managed by NIS but by Kerberos
– The NIS client of the Linux system – this is not a component provided by Centrify agent installation, here we are using a generic client, which could be slightly different from different Linux/UNIX forks – never mind, the generic NIS client will use « classic » NIS exchange with the Centrify NIS Gateway, so it will work
The good thing with this scenario, is we will get all the advantage provided by the Centrify agent but we will be able to use legacy NIS maps. As the NIS gateway server itself is using a Centrify agent, all the communication between the NIS gateway and Active Directory is secured. Another big advantage is the fact that we will not have any more a dependency with one single NIS Master – in this scenario, the « NIS master role » is technically provided by the different AD domain controllers, as the AD domain controllers are using multi-master replication, we don’t have any single point of failure there – The NIS gateway will act as a NIS slave and will cache the information from AD on his own system, and we reply to the NIS requests from the network.
It is existing other scenarios, where the NIS authentication (ok, I don’t like to use the expression « NIS authentication » because NIS is NOT an authentication protocol, but I make the things simple here by comparing with Kerberos…) will be provided by NIS even if the NIS maps are stored in Active Directory – but in this scenario we will need to store in Active Directory a hashed version of the user passwords compatible with NIS, we will not review this particular scenario there because it is not really used anymore and above all because it is not really secured (I will even say it is not secured at all…).
2/ Apply some settings at the NIS client level
Perform a connection, using root, to the NIS client, in our example, the NIS client hostname is : fedora23.
We will first check if the ypbind service (the NIS client) is up and running, so let’s execute the following command: systemctl status ypbind –l
If you get something like this :

It means the service is not started, and it means the ypbind packages are even not installed at all.
To check is the package are installed or not, let’s try to start the service using this command: systemctl start ypbind –l
The following message will confirm that the ypbind packages are not installed at all:

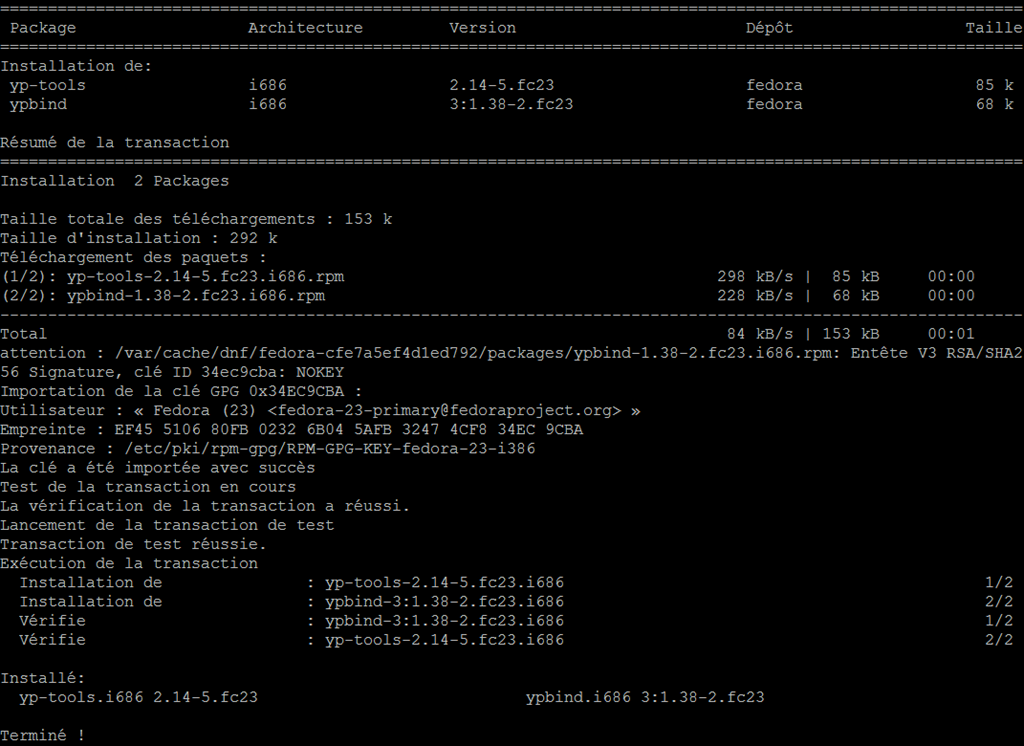
To install the NIS client packages, execute the following command: dnf -y install ypbind rpcbind
If rpcbind was already installed, you will get this message, it is not a big deal, just ignore it :

In all the situations, you may obtain something like that at the end of the packages installation:
After packages installation, I advise you to restart the system, it is not purely technically a requirement, but I was used to be a Microsoft Guy 😉
Never mind if you just installed the NIS client packages or if you were using it during years before this tuto, we will now stop the ypbind service on the client to apply some settings at the NIS client level: systemctl status ypbind –l
To be sure we will not have bad behavior because of previous settings/usage, we will delete all the files which are in the var/yp/binding directory: rm -rf /var/yp/binding/*
Now, we will define the NIS domain name at the client level – remember, by default, the NIS domain name is equal to the Centrify zone name where our NIS Gateway is acting, in our example, the zone name is arizona. So let’s execute the command: domainname arizona

Then, we will edit the /etc/yp.conf file to set the NIS domain name and the NIS Gateway hostname – in our example, we need to add the value: domain arizona server nisserver01
Example, with the nano editor:
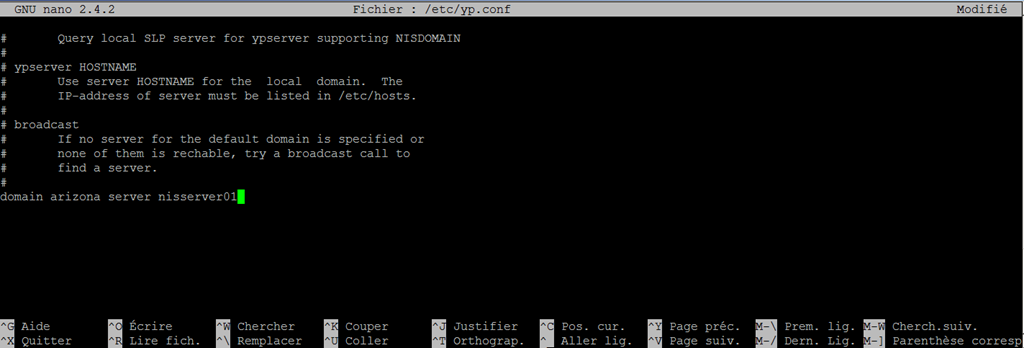
If you are using nano, after editing the value, let’s use Ctrl+O & Ctrl+X
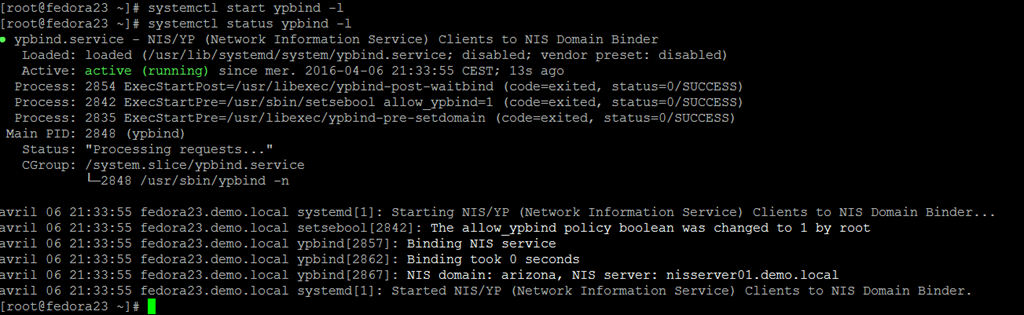
Now, let’s start the ypbind service: systemctl start ypbind –l
You can check the service status using this command : systemctl status ypbind –l
Note: if the NIS client is not able to contact the NIS server, so the NIS client service will not start. If you get an error when you try to start the NIS client service, the first thing to do is to disable the firewall service on the NIS server (use the following command to stop the firewall on a fedora system: systemctl stop firewalld –l )
At this stage, we have a NIS server and a NIS client which are able to communicate each other, let’s publish some NIS maps in Active Directory now !
E/ Fifth step: Publish some NIS maps in Active DIrectory
In this tutorial, we will use the Centrify graphical tool « Centrify Access Manager » to publish some information in the NIS maps, but you can do it using different ways (LDP command for example).
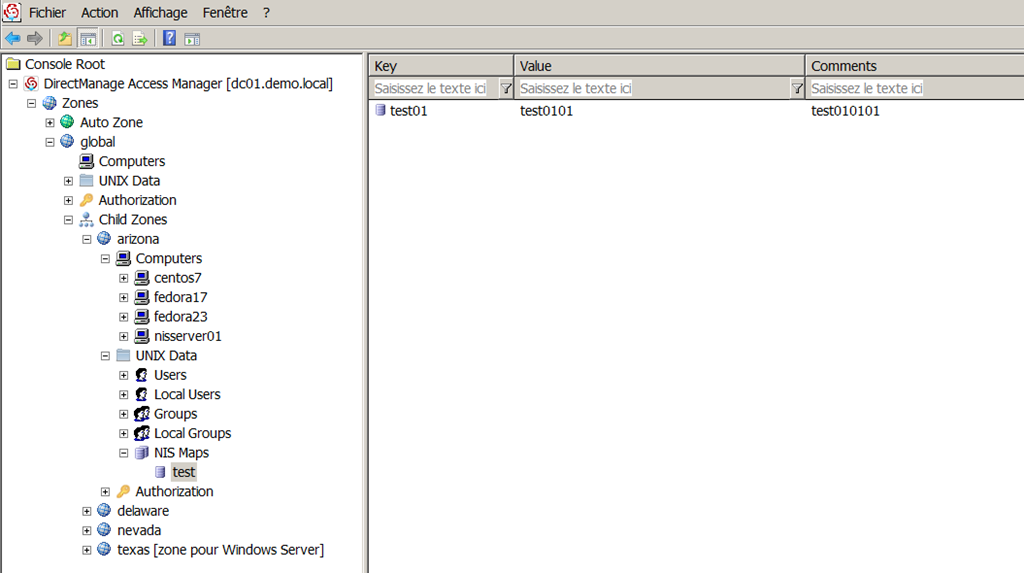
Start the Centrify Access Manager tool, and go the Centrify zone (arizona in our example) – Then go to ‘Unix Data’, then ‘NIS maps’ node. Right-click on the node and choose ‘New / Generic Map’:
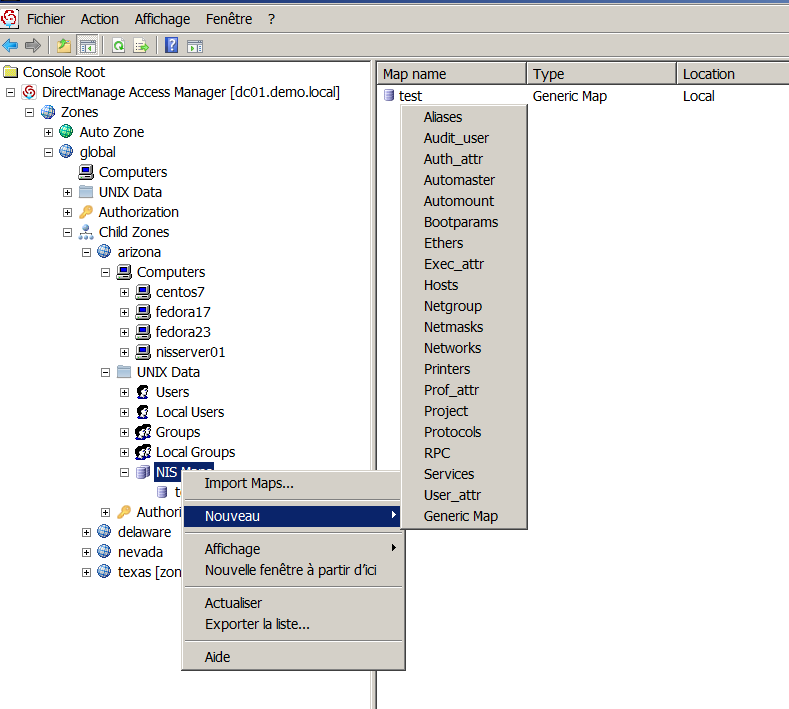
In our example, we will create a Generic Map, i.e. a map used to store text information with no direct relation with something used by the Linux system itself. For sure, you create some ‘classic’ NIS maps like Automount or Netgroup, but we will not cover the usage of these NIS maps in this article.
In this example, the NIS maps name is test and we have a key test01 with the value test0101:
From the NIS client, execute the following command: ypcat test – you may get the values from the NIS map test :

Here we go, it is working fine !
With the ypwhich command you will be able to confirm the NIS server name used by the NIS client (so in our example, it is the NIS Gateway hostname:
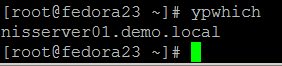
F/ One step beyond…
1/ Generated NIS maps
Let’s now explore, some advance details. To get the list of NIS maps from a NIS master server you need to execute the following command ypwhich –m
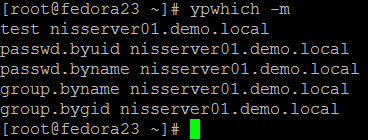
Here you can note two important things:
(1) from a NIS client, the NIS gateway is considered as NIS master server
(2) we created only one NIS map (test) in d’Active Directory but the NIS client is able the « see » four other NIS maps : passwd.byuid / passwd.byname / group.byname / group.bygid – These four maps are what we call ‘derived maps’, there are implicited generated from Active Directory data – In fact, at the system level (NIS client side), the NIS client needs to have a visibility of these four maps, so you don’t need to create it, the Centrify NIS gateway will create it and update it for you. So the passwd.byuid and passwd.byname maps will be automatically generated from the UNIX user profiles from the arizona zone, and the group.byname and group.bygid maps will be automatically generated from the UNIX group profiles from the arizona zone. Remember, behind the scene, the UNIX user profiles and the UNIX group profiles are linked with ‘real’ Active Directory user and group objects.
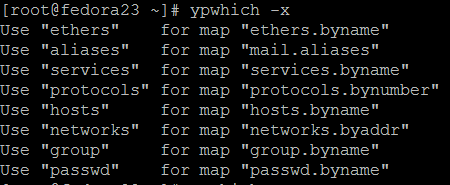
If you are using the command ypwhich –x you will be able to see the correspondence between NIS maps aliases and the real technical name of such NIS maps.
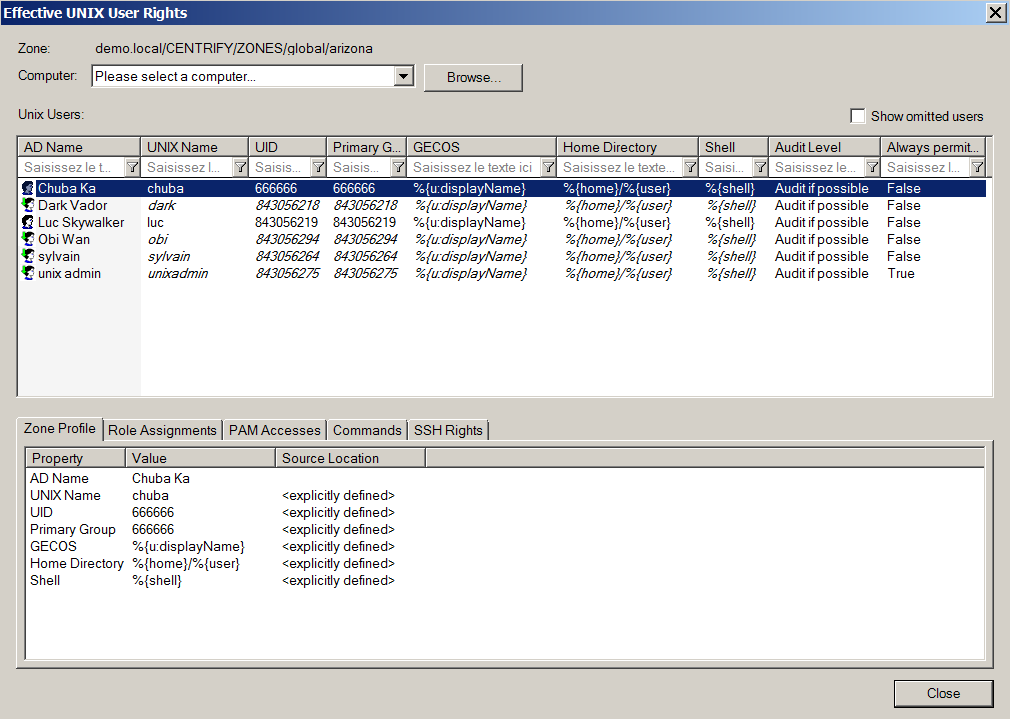
If you are using the command ypcat passwd you will be able to see the content of the generated map passwd.byname which is the list of the UNIX user profiles from the zone arizona :

To fully understand this feature, you can open the graphical tool Centrify Access Manager and check the list of UNIX user profiles from the arizona zone, you will exactly the same list :
2/ NIS maps objects in Active Directory
We can check how the NIS maps objects are stored in Active Directory – let’s use Microsoft Active Directory Users and Computers tool (ADUC) or a basic LDAP client to do so.
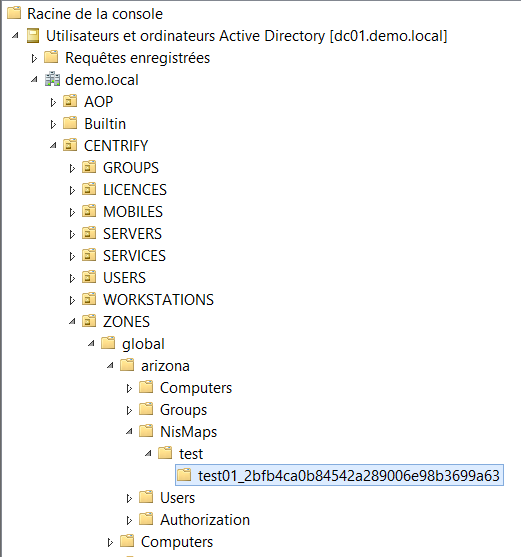
If you go to the zones containers, you will be able to see all the Centrify zones you created (not cover by this article) – select the arizona zone, and the NisMaps container, you will list the NIS map we created, means the test NIS map.
Under the test container (our NIS map), you will see the entry we create named test01:
If you do right-click on the test01 object and choose ‘Properties’ (with ADUC, Attribut Editor), you will see the different values from the different attributes used by Centrify to store the information:
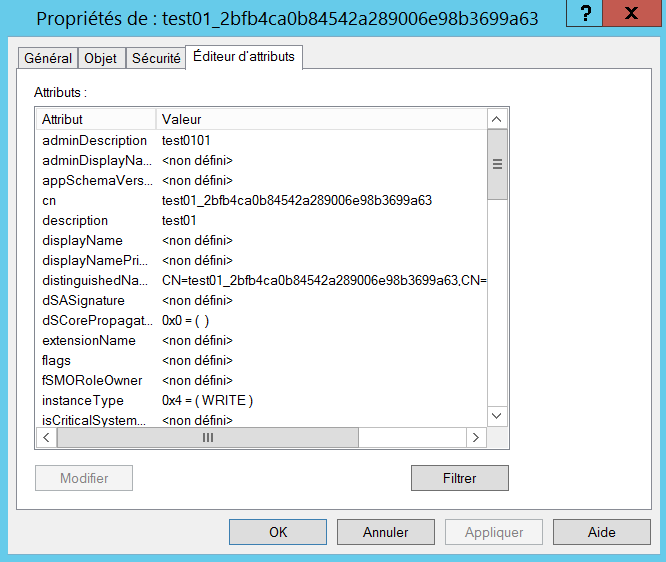
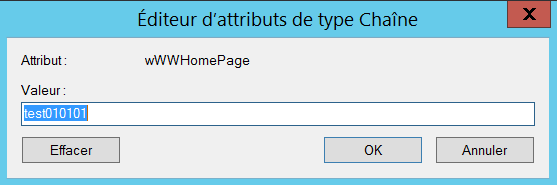
If you look at three specific attributes, we will review the values we put in the system with the Centrify Access Manager tool for our test map – as a reminder:

These are the three attributes:
KEY: (description)
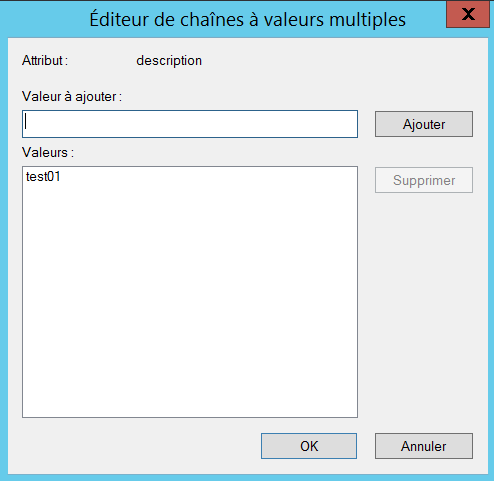
VALUE: (adminDescription)
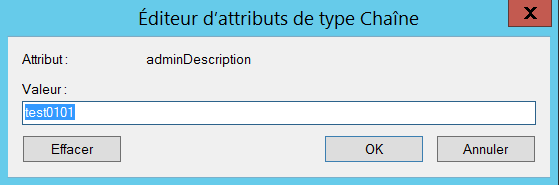
COMMENTS: (wWWHomePage)
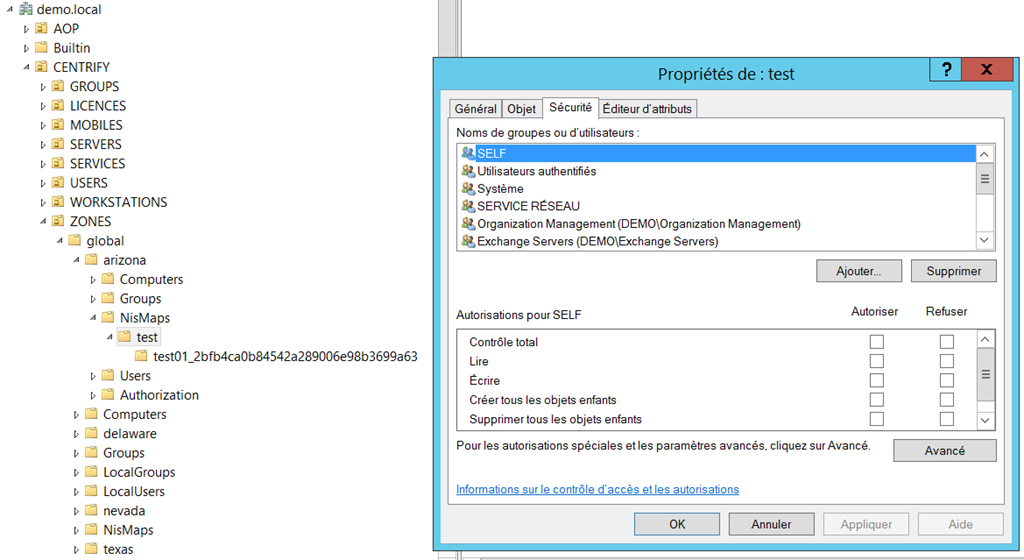
For sure, you will be able to use Active Directory ACLs Active Directory to provide access and delegation for such NIS map or even some specific rights on a specific value: this is very useful to define the NIS administrators AD group which will be able to create or update NIS map values in the future:
The main difference for the UNIX administrator will be the interface. As now the NIS maps are stored in Active Directory, they will use a LDAP Browser, the Centrify graphical tool or some LDAP script to maintain the NIS maps contain.
At the end, the ideal situation will be to use a IAM tool such MIM for example to manage the NIS maps lifecycle with delegation, workflow, approval and activity logs !
We did it !
Now, this tutorial is finished. Don’t hesitate to add some comments or contact me if you have any questions. Let’s discuss on twitter (@sylvaincortes) or by email if you have a NIS migration project, we can help you 😉